
How To Upgrade RAM On A Desktop - FAQs
Published 3rd August 2019 | Article by MemoryCow | Posted in FAQs
Desktops continue to be the workhorse of the office or home due to their often more powerful attributes and ease of use over laptops. Over time, or even in some cases from brand new you may find that you need to add more memory to your system to enable you to browse quicker online, use more programs at once, or generally to remove any sluggish behaviour that you may be encountering with your Desktop.
This guide shows you how to upgrade the memory on your Desktop to boost performance. Upgrading the RAM on your Desktop is the most cost efficient and quickest way to boost performance. This guide can be used for all current memory types that include DDR2, DDR3 and DDR4 memory types.
How to upgrade RAM on a Desktop.
Before you can perform this upgrade you need compatible/additional memory. Use our RAM finder/configurator here to find compatible RAM for your system. Our configurator guarantees compatible memory to remove the hassle of trying to figure out what memory you need.
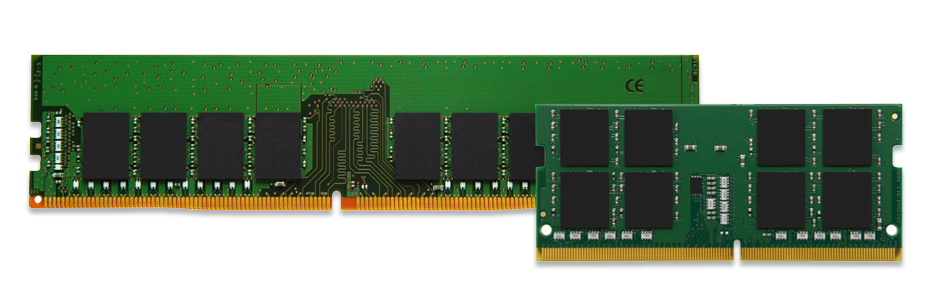
If you need to purchase memory for your system then you need to establish which type of memory you require. Some Desktops, mainly the AIO (All-In-One) types use SODIMM memory, whereas the traditional Tower Desktops will use the DIMM memory. Below shows and image of a DIMM (left) and an SODIMM (right).
You may already have your Memory, so in that case go ahead and use our guide below.
Step by Step Guide to Installing Desktop Memory
This guide covers the major Desktop type systems which can be referred to as Desktops, AiO's (All-In-Ones) or Workstations.
1. Disconnect the power from your Desktop/System by "powering it down" from the desktop (usually by clicking the start menu on Windows and then pressing shut down), and then once powered down, remove the mains cable from any plug socket.
2. Next, locate where your memory is fixed withinin your system. It will be attached to the motherboard. Some Desktops that are referred to as an AIO (All-In-One) (left image below) usually have the memory located within the back of the screen whereas the more traditional type of Desktop has a tower (right image below) in which the memory will be contained. The tower is normally accessible by removing the panel encasing the Tower all round it, except the front, normally by thumb screws which you can unscrew by hand and fingers, or with several philips type screws. Some Desktop Towers also have a lever type clip on the side which can be pulled to remove the panel from the side of the tower. If you are unsure we recommend referring to your manual.

3. If your Desktop uses the SODIMM type memory then you can use our "How to Upgrade RAM On a Laptop" guide here, as this will be more of a suitable guide on how to upgrade/replace the memory.
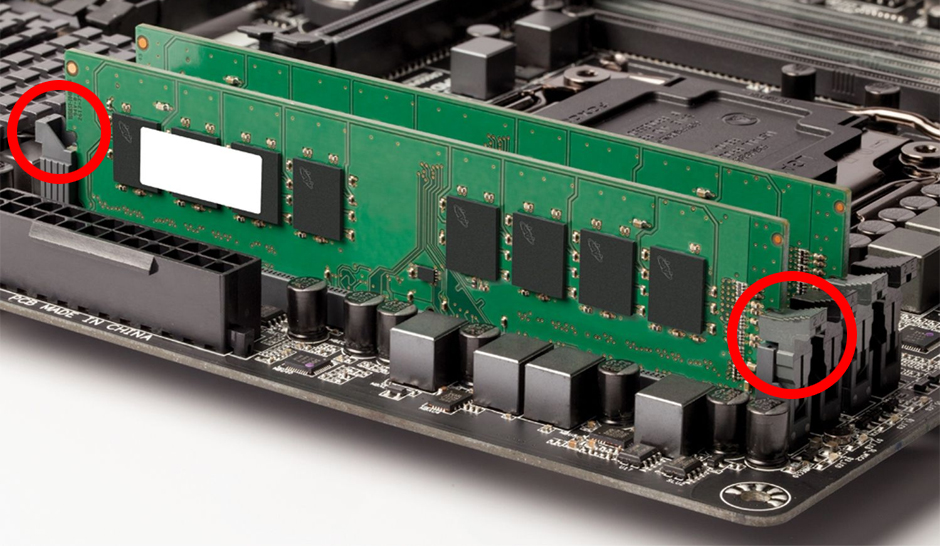
4. Next it's time to find and remove the memory or find the spare memory slots to add in more modules. Once inside your system you should be presented with the memory clipped in and attached to the motherboard. See image below. The red circled highlighted parts below indicate the clips that need to be pressed to remove the memory.Each DIMM has one clip per end. Simply press down firmly at each end to release the memory from the board. Once unclipped the memory should easily pop up to then be removed. You are OK to be firm with the clips. They're strong.
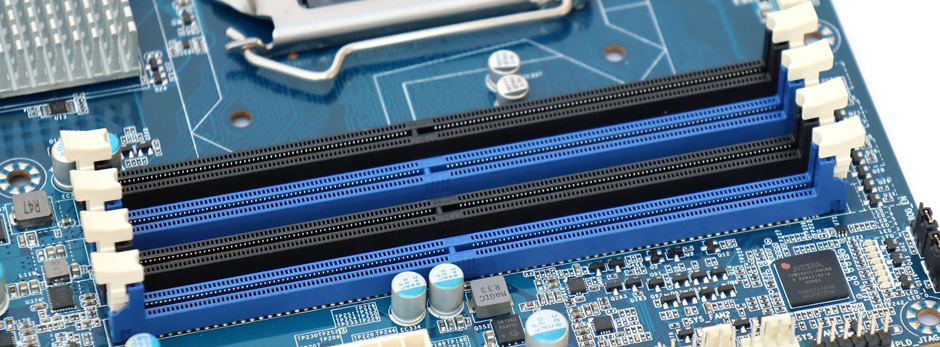
5. Once the memory is removed you will be presented with the DIMM carriers as below. The clips seen at the end of each carrier are used to secure the memory into the carriers. The colour coding of the carriers below likely indicate the preferred installation of memory in pairs and fours. For example if installing pairs you would install into the black slots. We recommend you refer to your systems manual for more information on this and whether your system supports dual or quad channel for example.
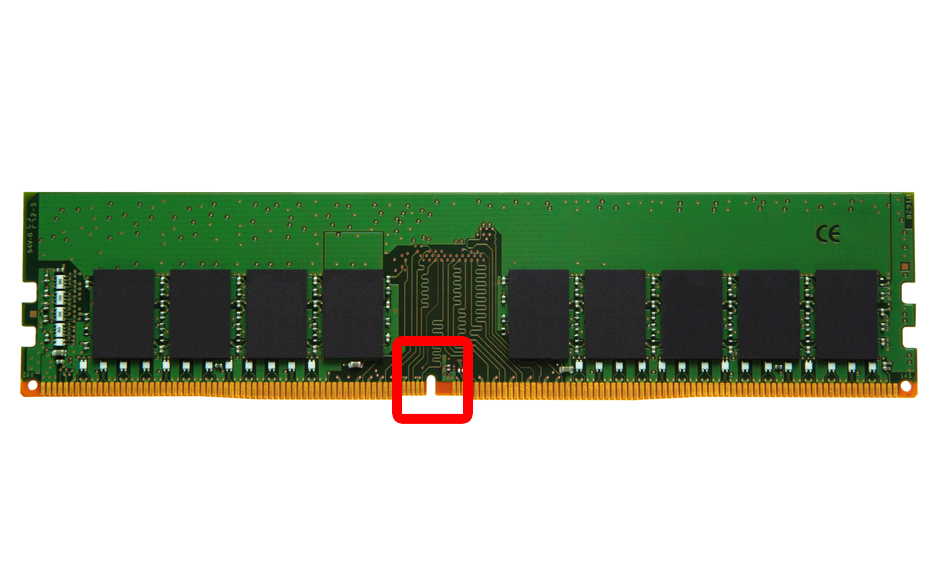
6. Next its time to add in your new memory modules. The first image below shows what is known as the key or notch which you need line up with the notches on the memory carrier. The second image shows the notch/key on the memory carriers. Simply line the two up and press the memory modules into the carriers. You can be firm with the modules. The clips on the end of the carriers should then pull into place as you press firmly into the carriers your new memory modules.

7. Next its time to re-boot your system. A good tip would be to leave any outer casing off your desktop incase there are problems on booting your system, such as the memory is not installed properply. To re-boot, simply re-connect the power and boot your system. Your BIOS should automatically recognise and configure your memory for you.